THREAD · STRUCTURE · PLACEMENT
Embroidery for Custom Apparel
Choose flat, 3D foam or appliqué after the final size, fabric and garment position are reviewed. Approve the stitch-out—not only the screen preview.
- Best for
- Clear logos, lettering and thread-led detail
- Review first
- Light stretch, dense fills and difficult placements
- Approve by
- Actual-size stitch-out on the intended fabric
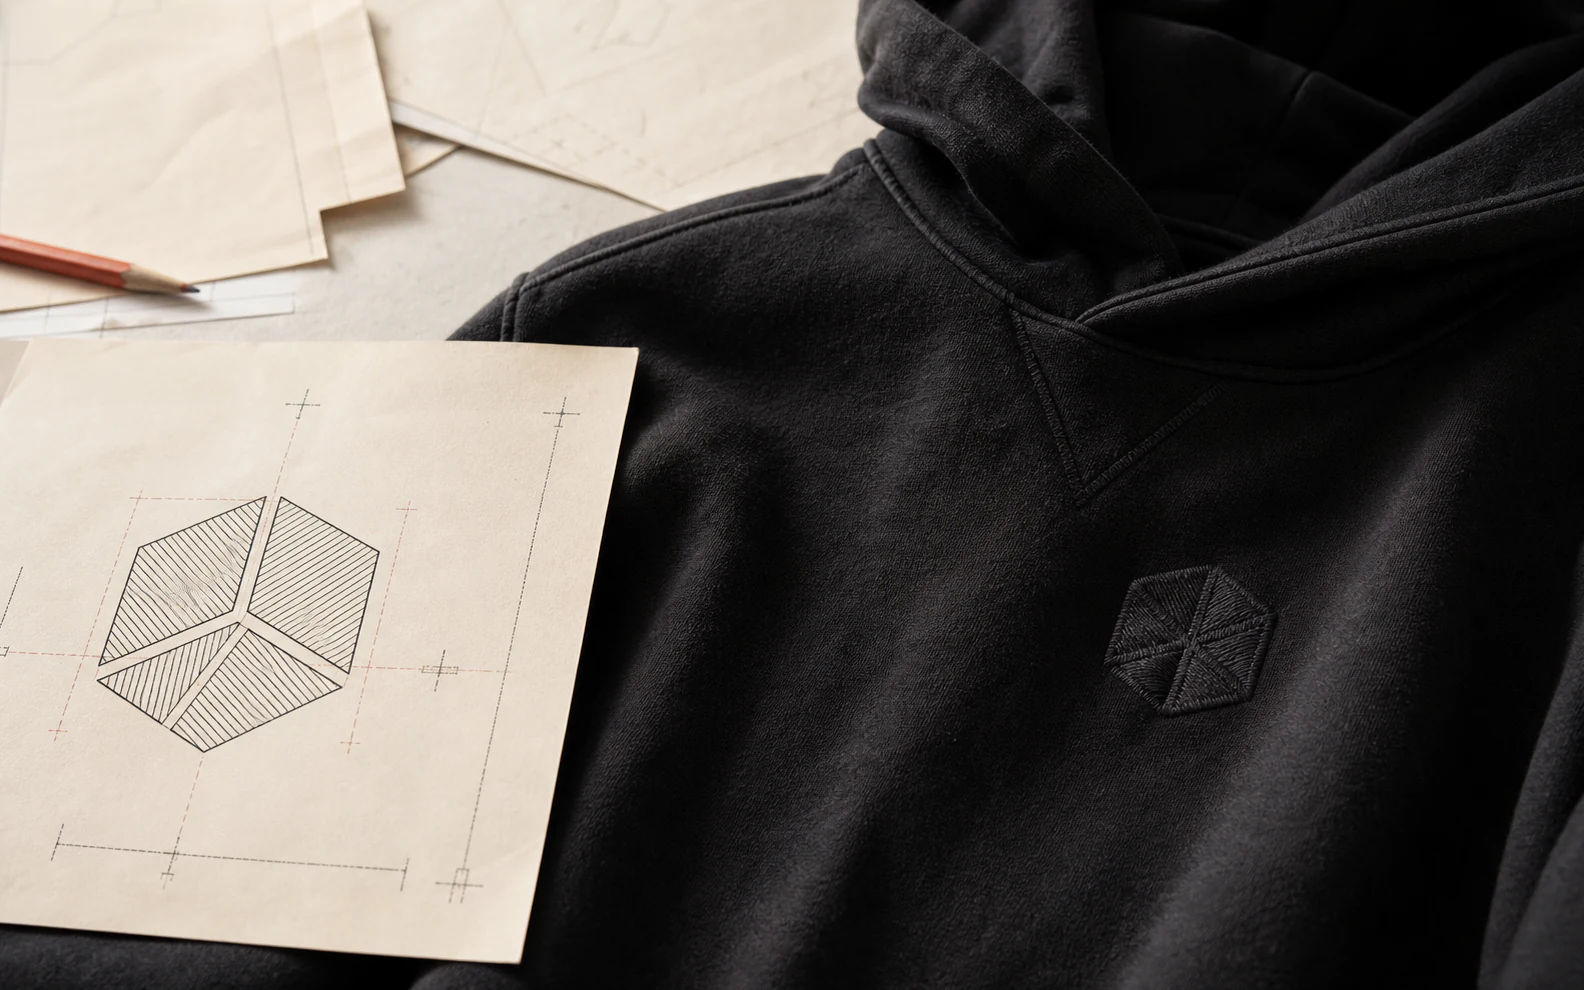
CHOOSE THE STRUCTURE
Flat, foam or an added fabric piece?
All three can look raised. They are built differently.
3D puff embroidery is not Puff Printing, and appliqué is not automatically a pre-made patch.
Each route needs its own digitizing and physical sample.
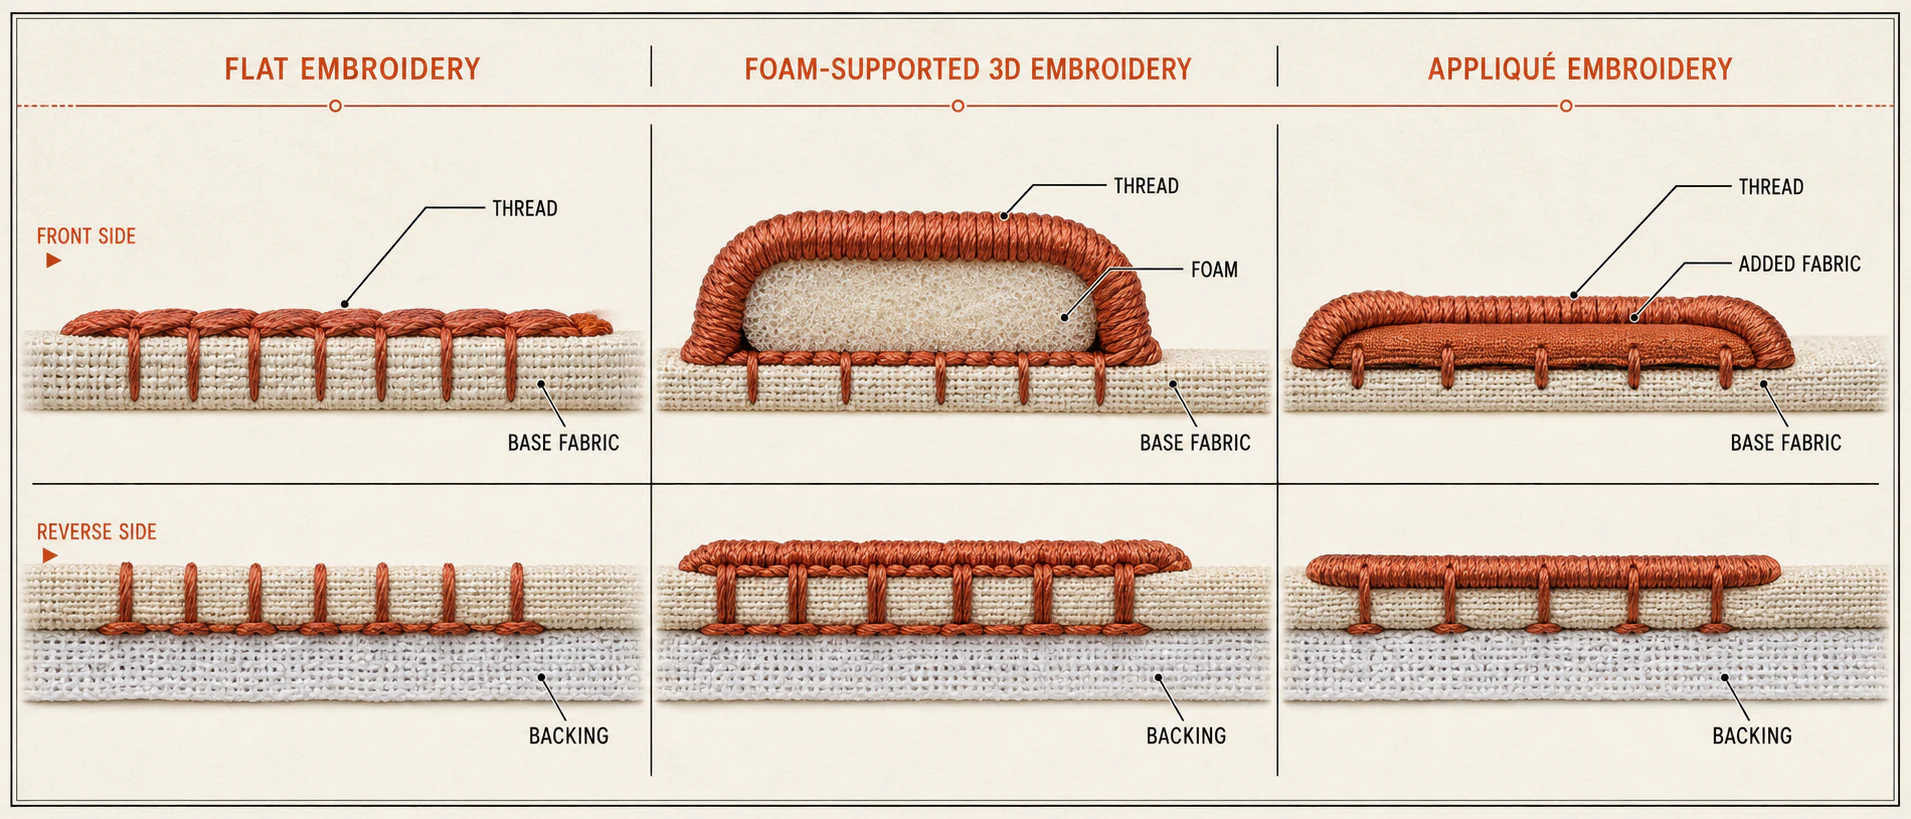
Flat embroidery
Thread forms the design directly on the fabric.
3D puff embroidery
Stitches cover foam, and excess foam is removed after sewing.
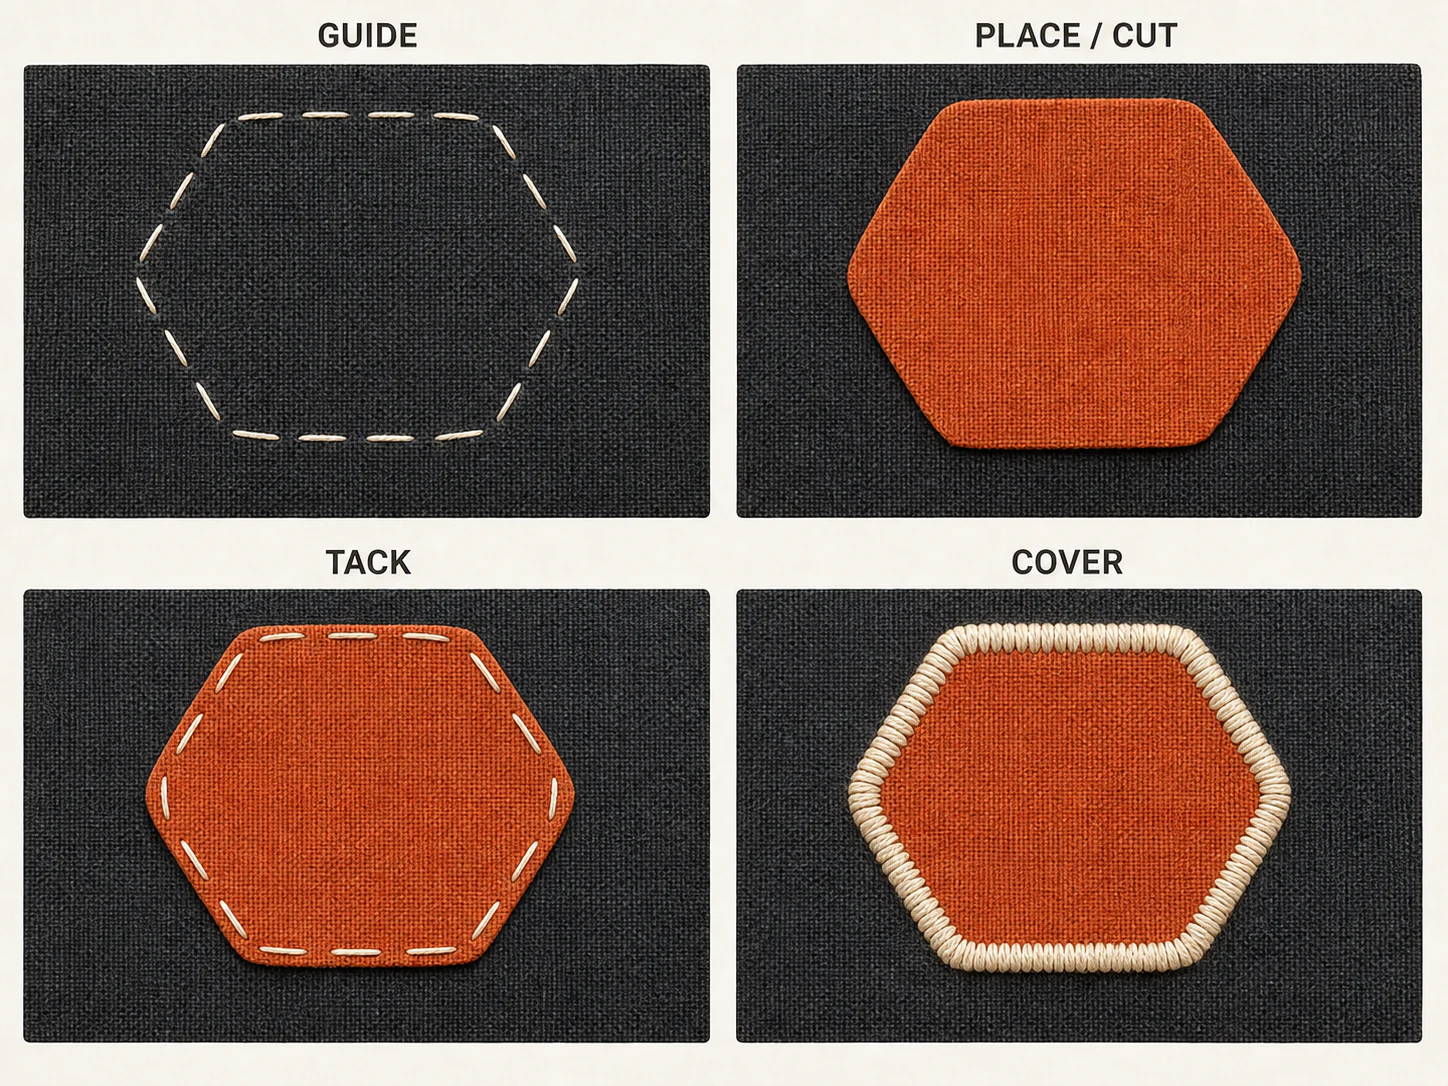
Appliqué embroidery
A separate fabric piece is placed, tacked and finished at the edge.
STITCH COUNT IS NOT PIXEL COUNT
One logo becomes several stitch decisions
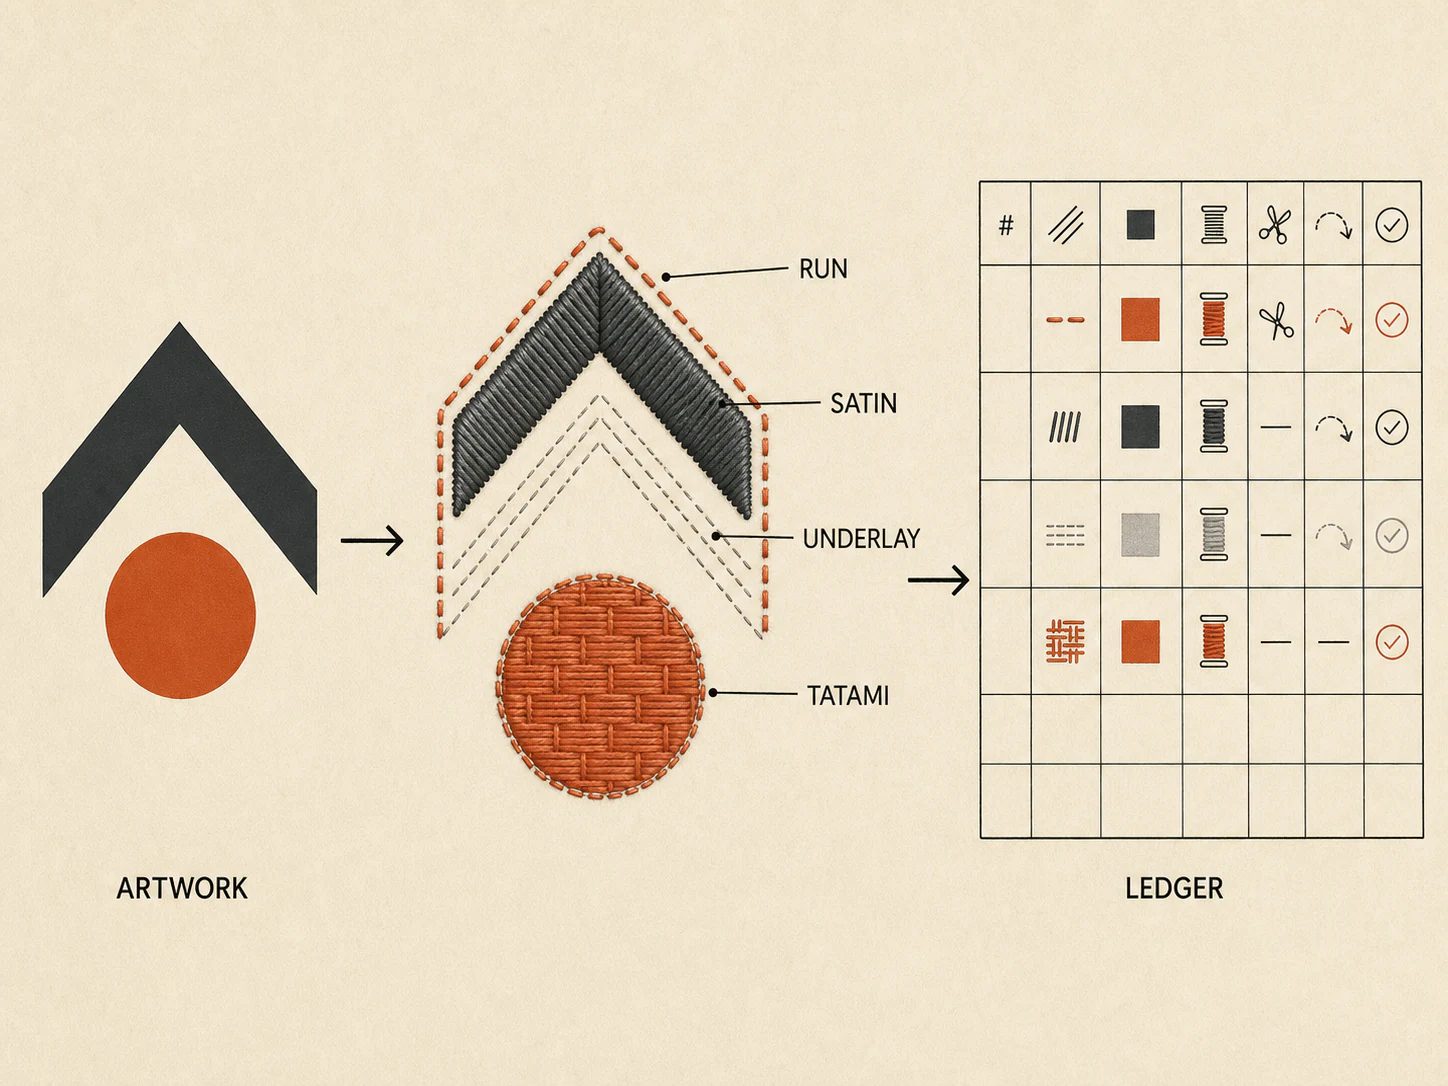
Digitizing converts artwork into stitch objects and machine data.
Resizing changes the construction—not only the number on the screen.
Quote the approved size and route, not the artwork alone.
Final size
Lock the finished width and height before estimating the file.
Stitch construction
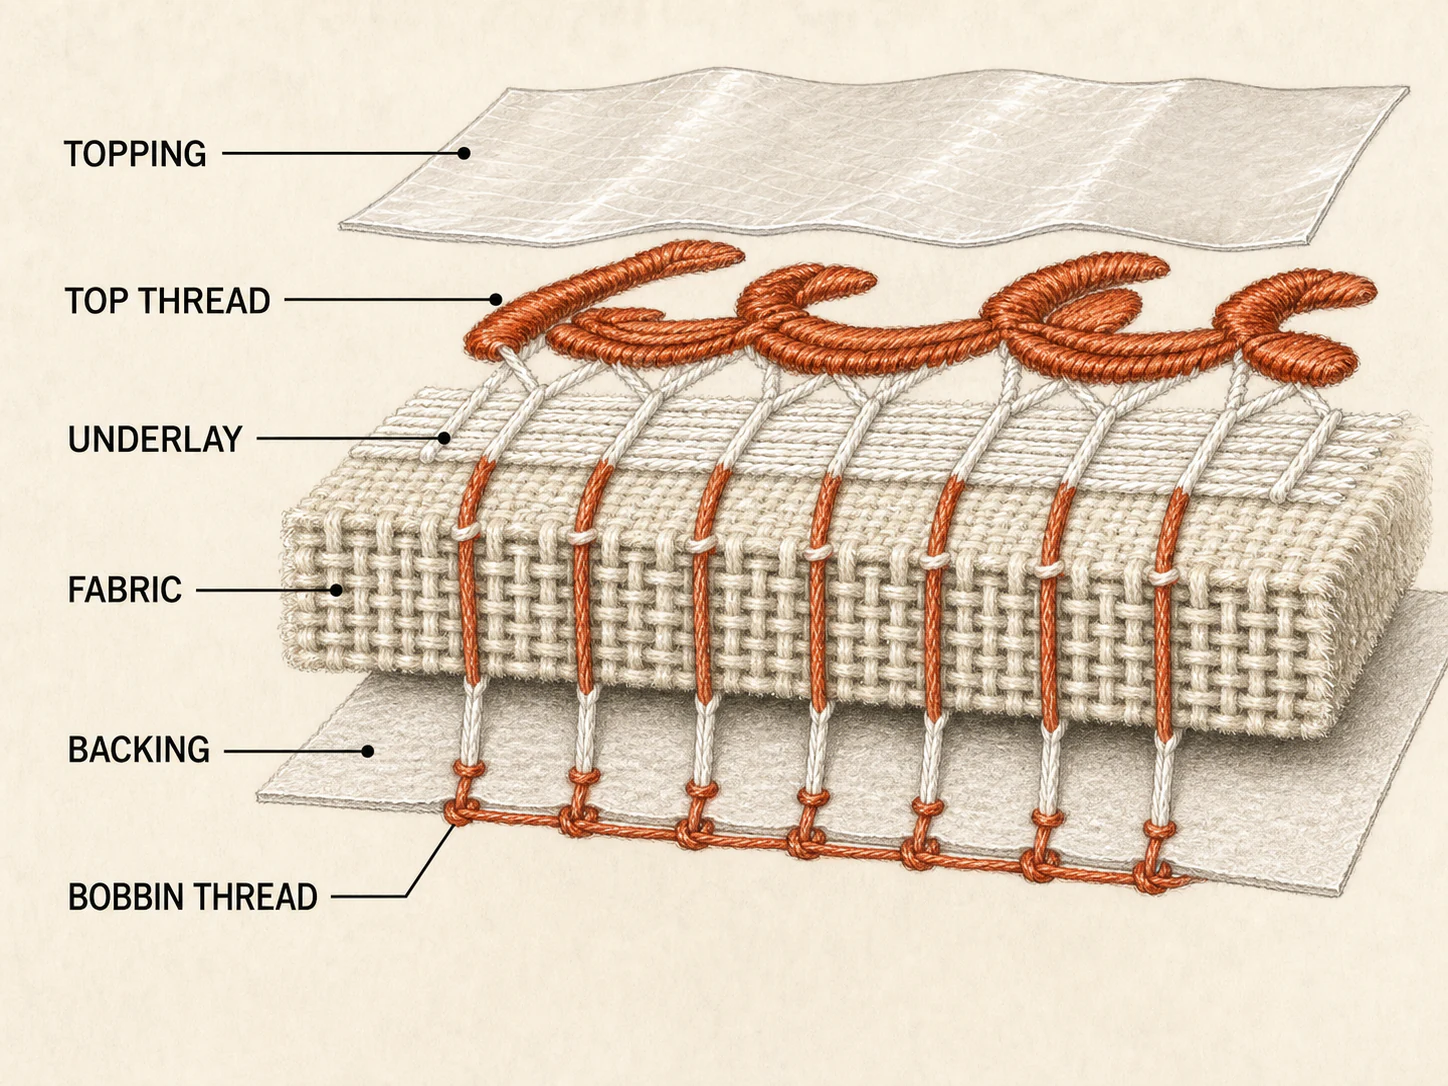
Run, satin, tatami and underlay solve different shapes and support needs.
Production events
Colour changes, trims, jumps and sample revisions also affect the job.
READ IT AT THE FINAL SIZE
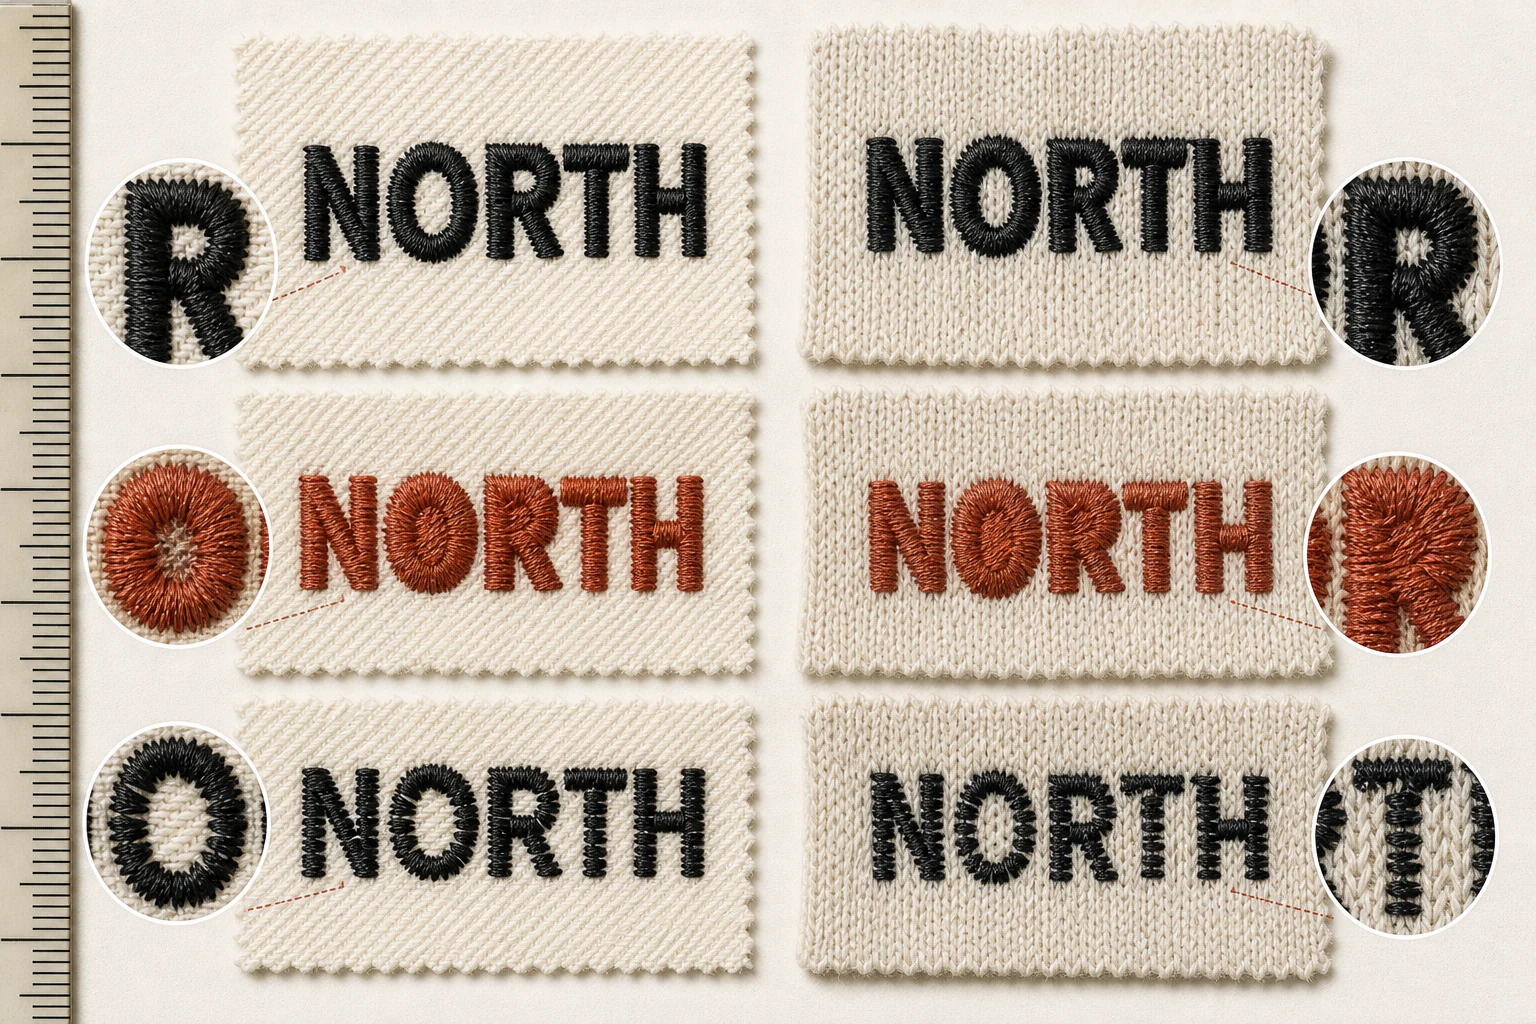
There is no universal minimum letter height
Small detail depends on the font, stroke, thread, needle, stitch type and fabric.
Mark the details that cannot change, then approve their readability on the intended fabric.
A published dimension is a risk signal for its stated conditions, not a Canton Fashion pass/fail guarantee.
Final dimensions
Review the smallest letter, stroke and opening at production size.
Fabric and stretch
Check whether the structure can support the planned stitches without closing the detail.
Simplification
Open negative space, thicken strokes or remove tiny isolated elements before the sample.
BUILD THE STACK FROM THE FABRIC
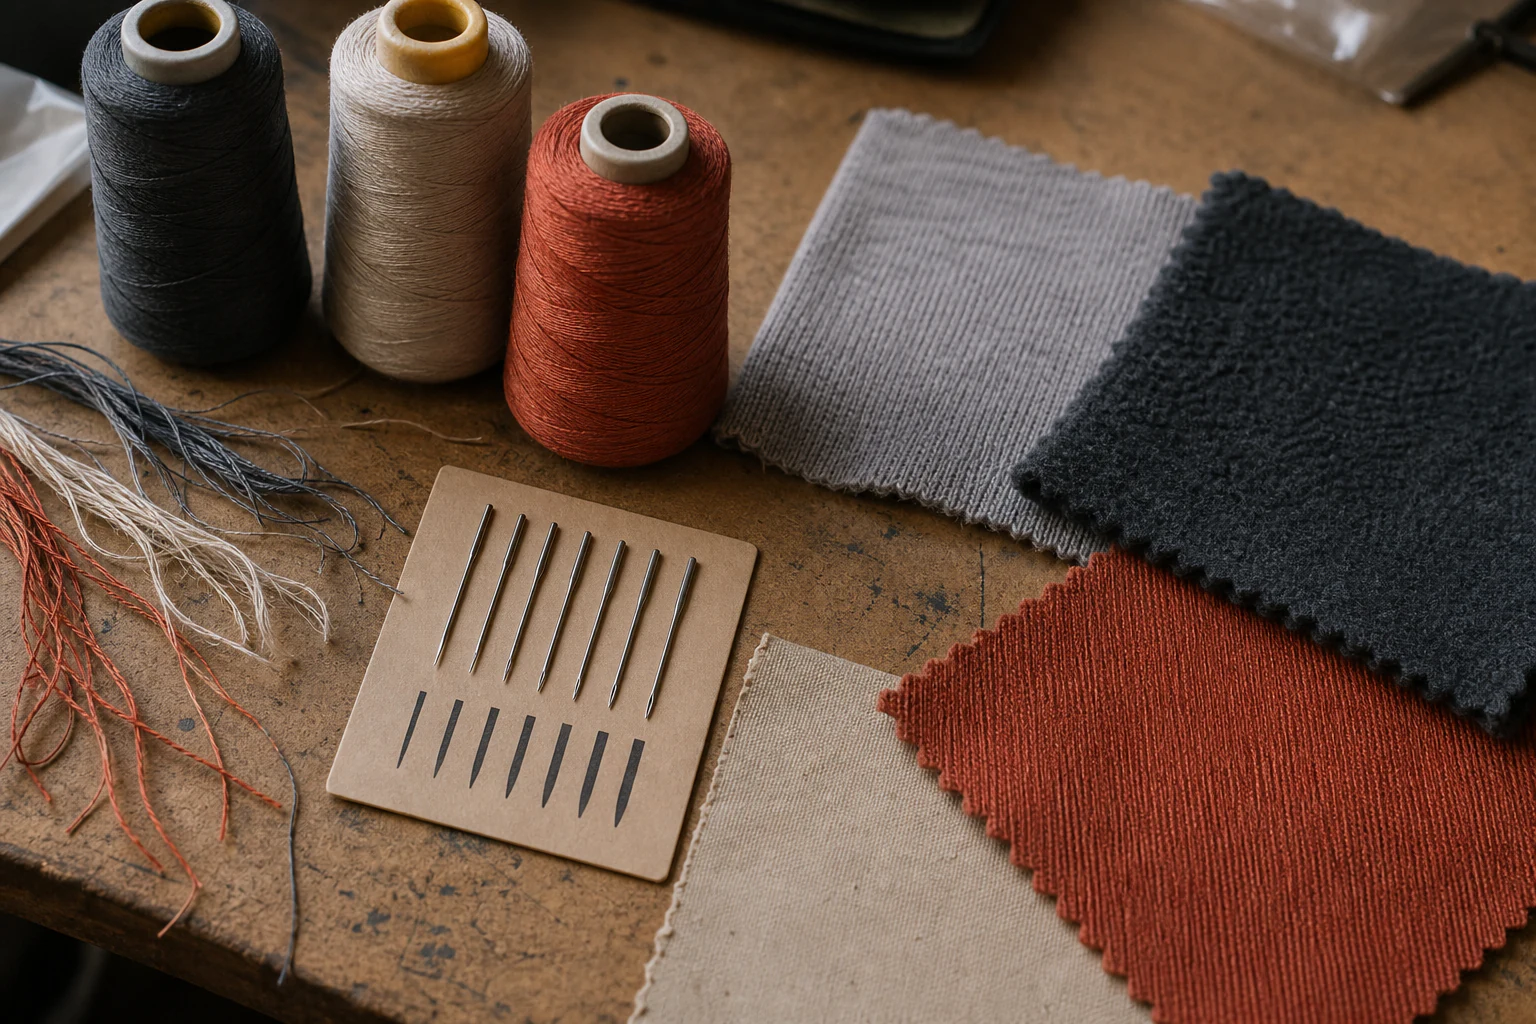
Thread, needle, fabric and backing work as one system
The fabric comes first. Thread weight, needle point, density and stabiliser follow.
These are sampling directions, not a claim that every material or position is available.
If water resistance matters, agree the needle-hole sealing route and finished test before production.
Stable woven
Review needle point, stitch density, edge quality and handfeel.
Fleece and textured knit
Review stitch sinking, topping, cut-away support and reverse-side comfort.
Jersey and stretch
Keep the design controlled and test puckering, damage, recovery and backing visibility.
Coated or waterproof fabric
Review needle heat, coating damage, holes, sealing and finished performance.
THE GARMENT MUST MOVE WITH THE FRAME
Placement is a structure decision
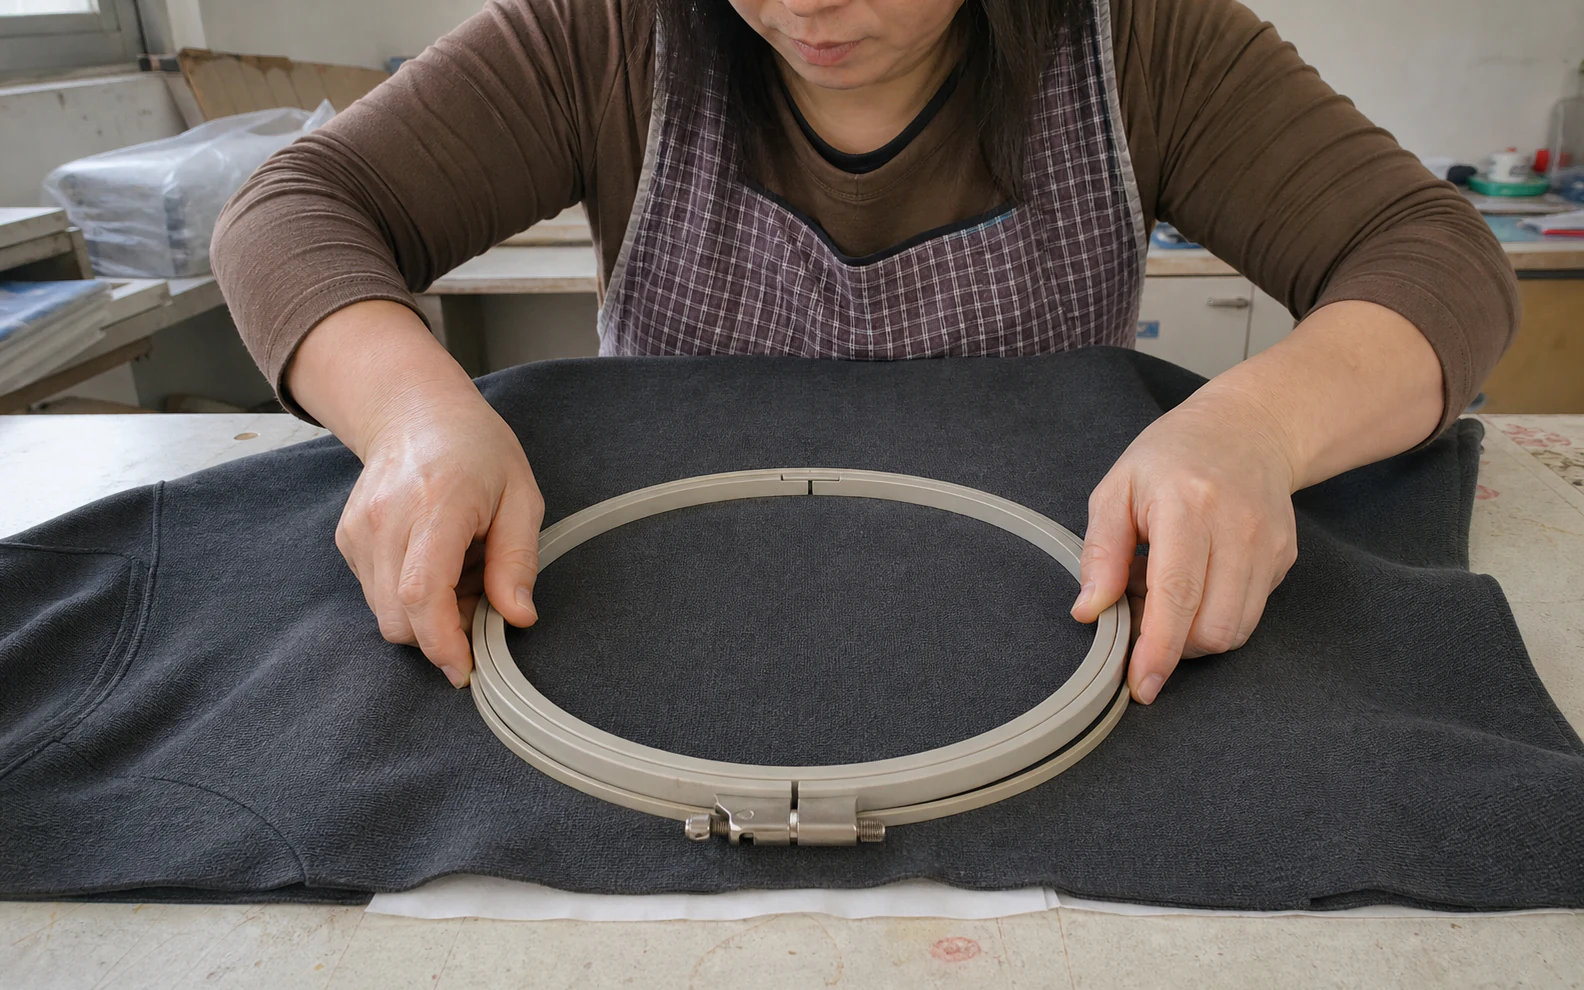
Use the smallest suitable hoop and hold the fabric flat without overstretching knits.
Check the reverse for lining or another garment layer before sewing.
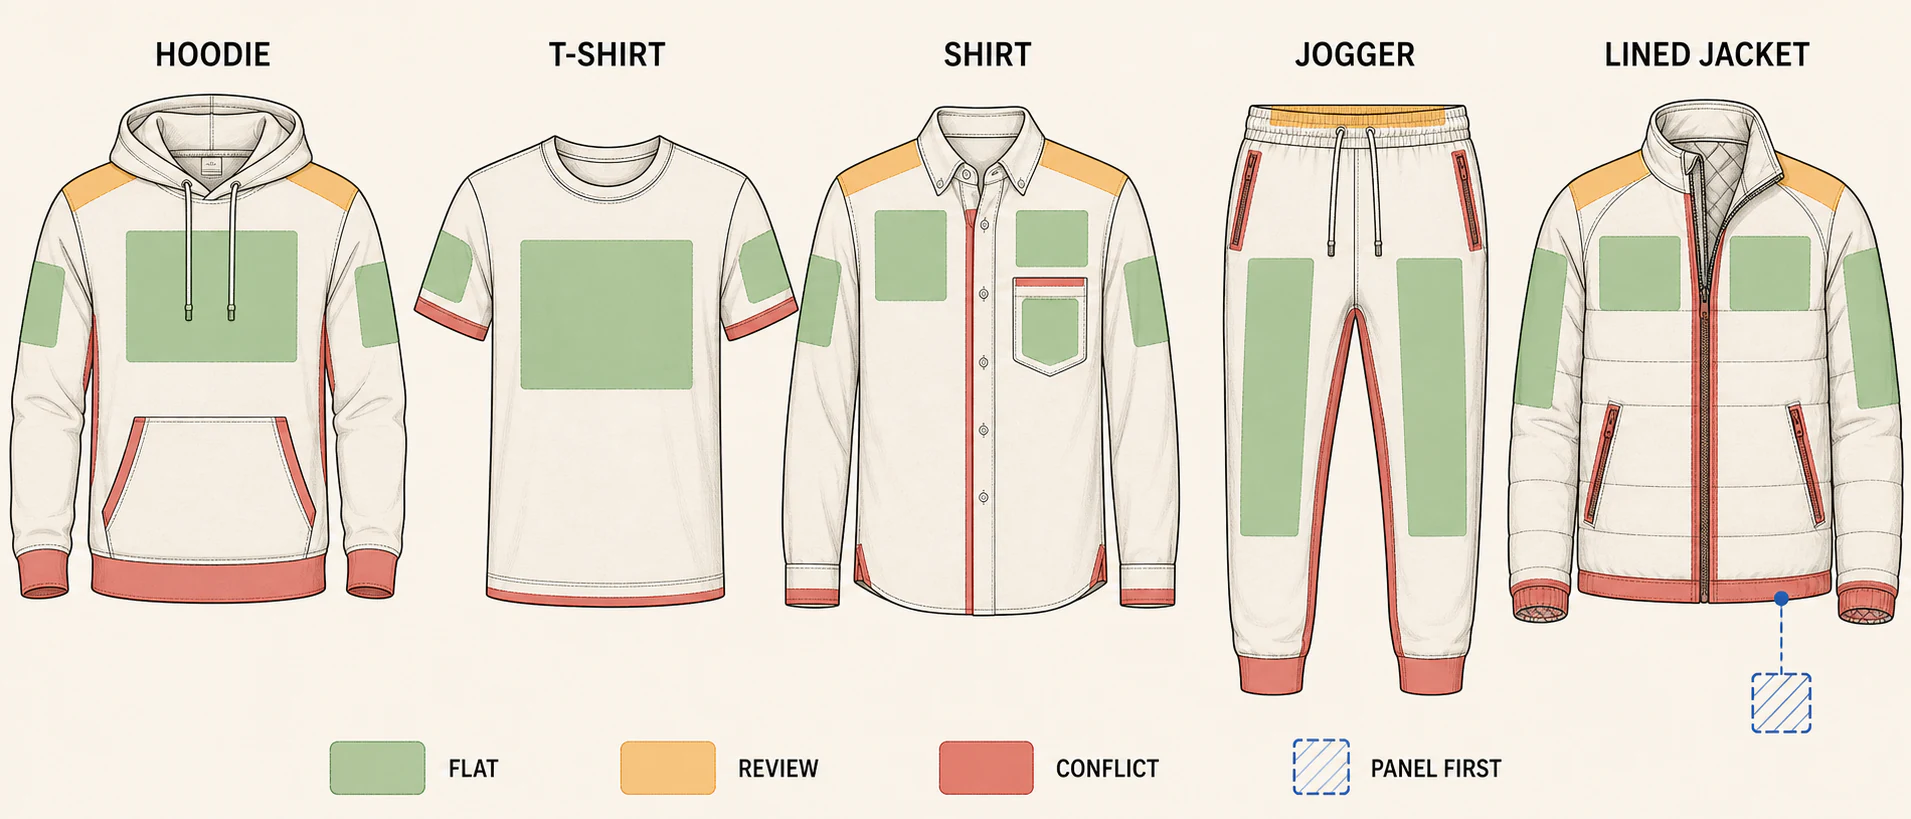
Pockets, cuffs and narrow panels may need adhesive backing, a clamp, a position change or panel-first embroidery.
- 01
Flat starting area
A controllable panel away from heavy seams is the natural first sample.
- 02
Review the support
Knits, pile, lining and delicate surfaces need a defined support and framing plan.
- 03
Seam or hardware conflict
Move the design or assess a different production stage when the frame and needle path cannot be controlled.
FROM ARTWORK TO SEALED SAMPLE
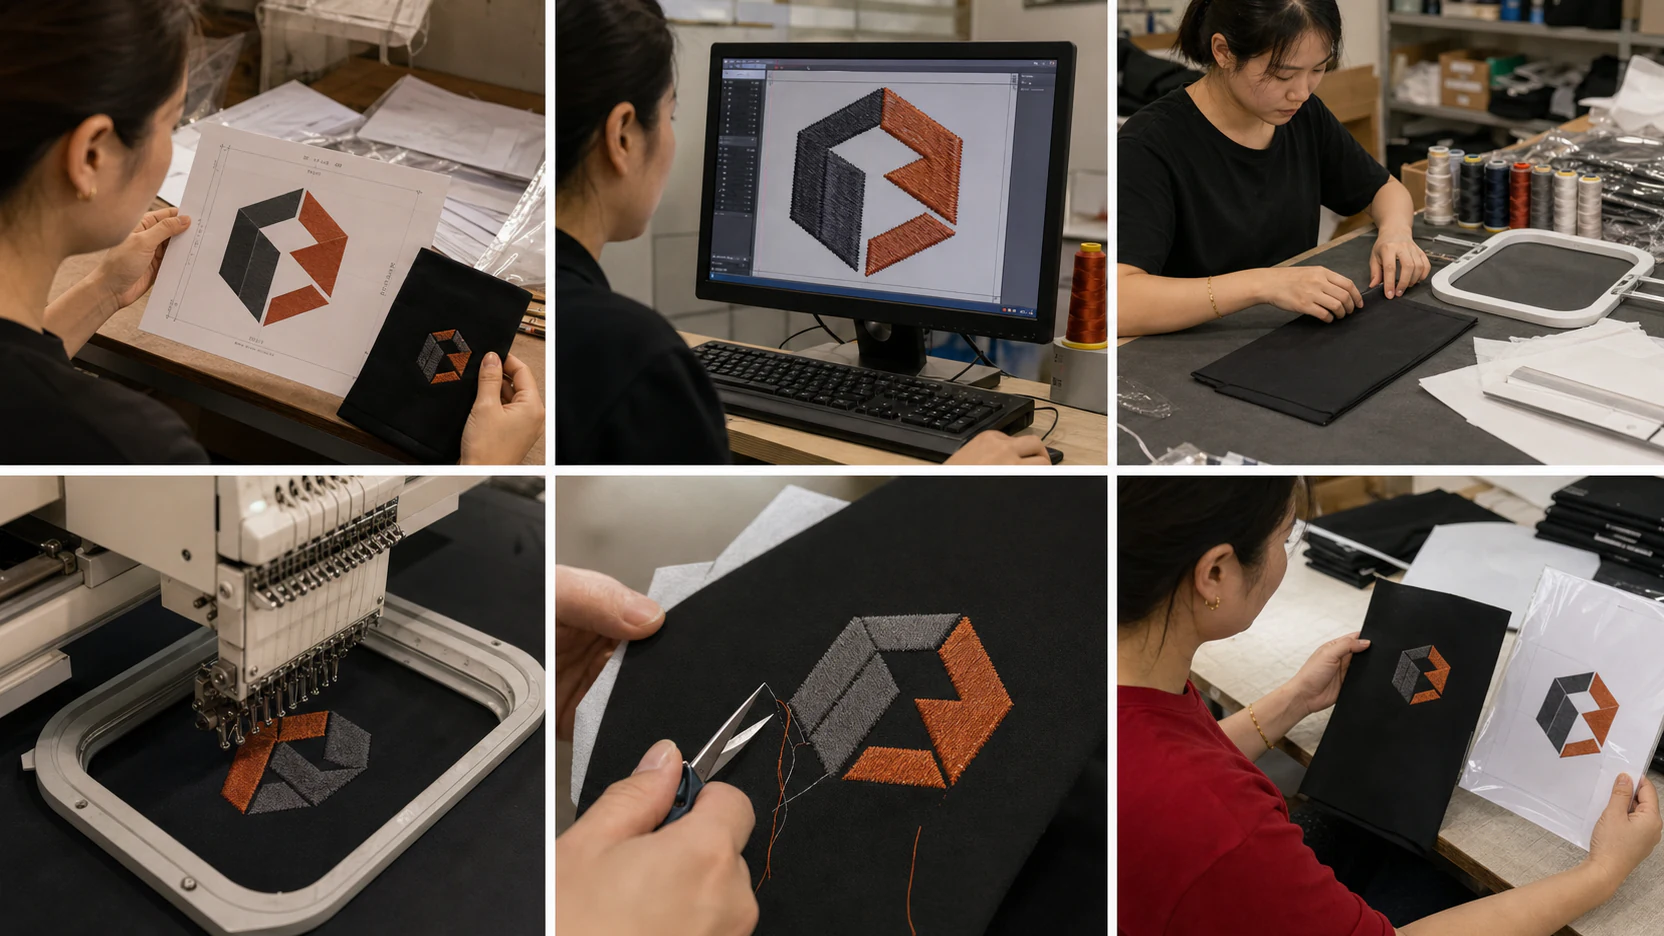
The sample controls the production file
A digitized preview, a test sew-out, an actual-fabric approval and a production first piece are different checkpoints.
Freeze the design revision, size, position, thread, support and route with the approved sample.
Revise the file or construction before bulk if the stitch-out exposes a problem.
- 01
Brief and digitize
Confirm artwork, size, fabric, placement, route, quantity and care before building the stitch objects.
- 02
Build and test
Select the thread, needle, support and frame, then sew the actual-size sample.
- 03
Revise and seal
Correct detail, registration, damage or support before freezing the sample.
- 04
Release and inspect
Compare the first piece and ongoing production against the sealed sample.
LOOK CLOSER BEFORE BULK
Five defects the buyer can see
Inspect the front, reverse and surrounding fabric before approving bulk.
A visible symptom may have several interacting causes, so correct the construction and repeat the sample.
Write the acceptable size, placement and appearance tolerance into the approval sheet.
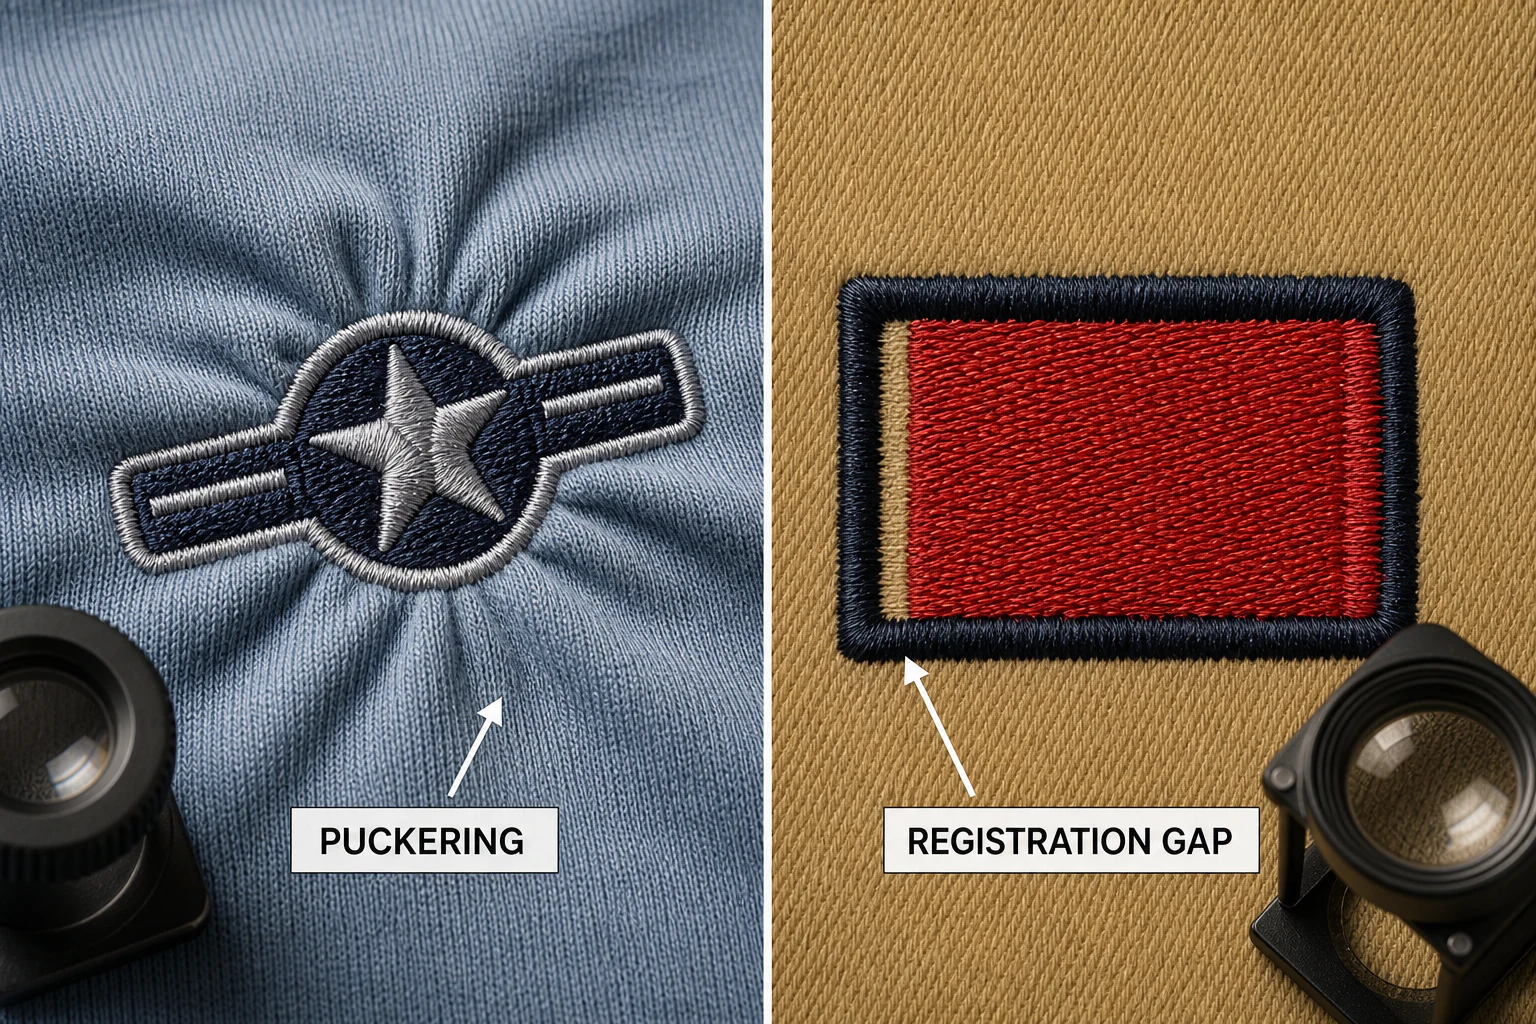
Puckering
The fabric waves around the design; review density, tension, hooping and backing.
Registration gap
The fill and outline no longer meet; review movement, underlay, sequence and compensation.
Fabric damage
Needle holes, broken knit yarns or coating damage appear around the design.
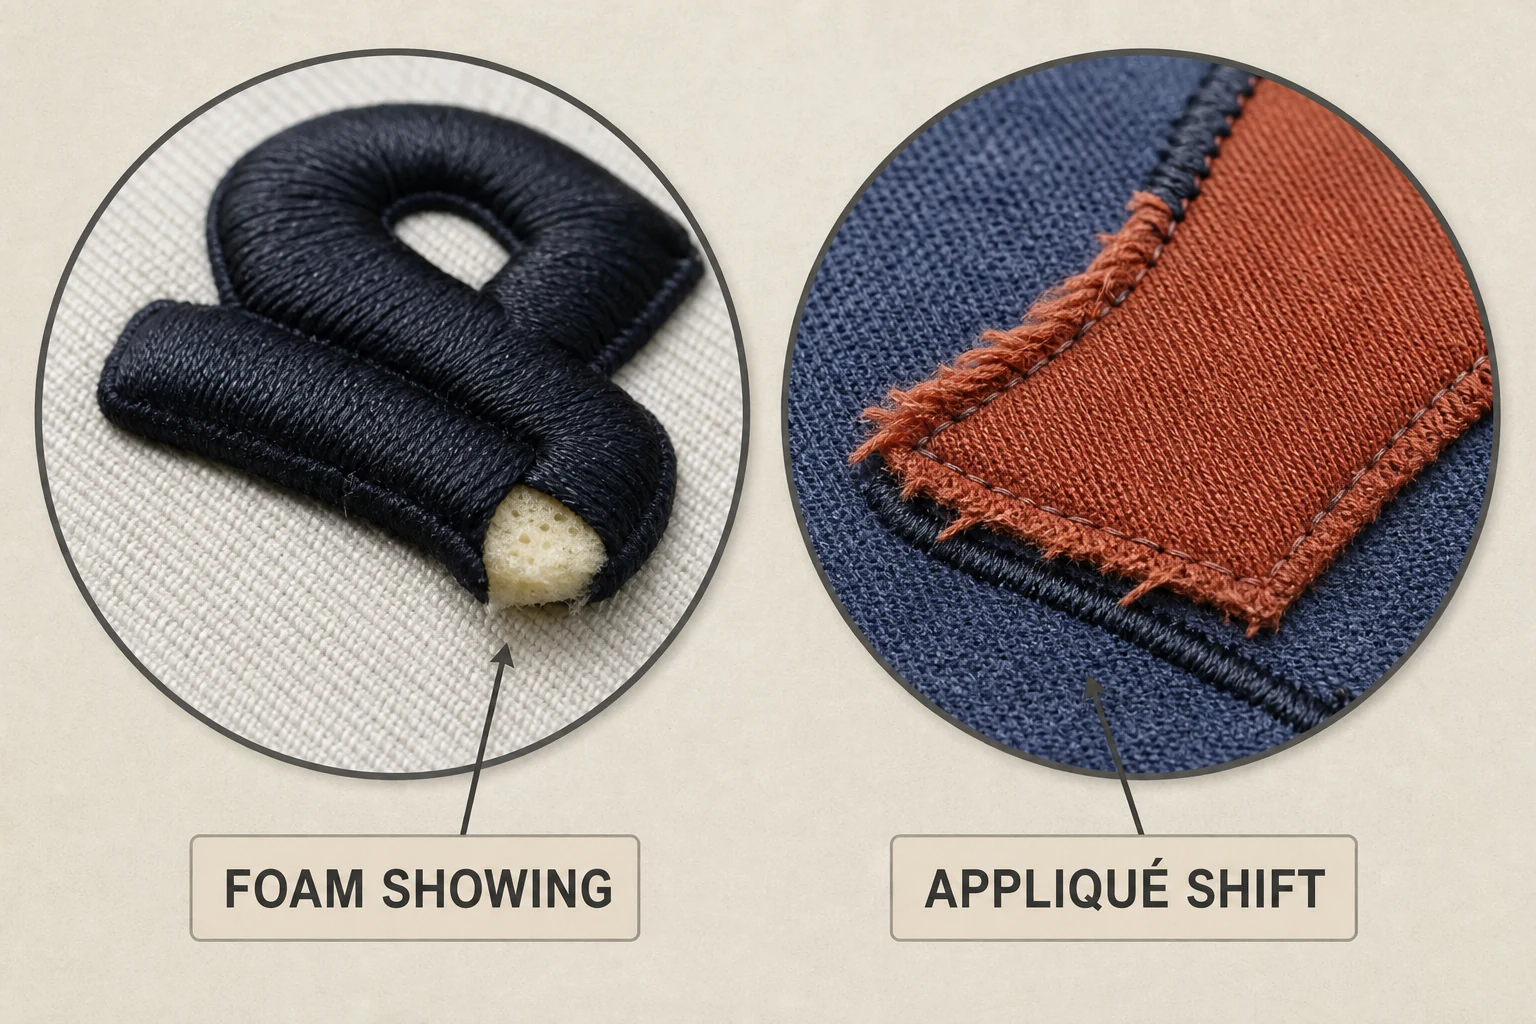
Foam showing
Puff foam remains visible at an edge, corner or small opening.
Appliqué shift
The added fabric moves outside the tack or cover edge.
COMPARE THE STRUCTURE, NOT THE NAME
Embroidery is not always the best way to raise a logo
Choose by construction, artwork, fabric and sample result—not by a premium ranking.
The four adjacent techniques are comparison text only until their proposed links enter the approved internal-link matrix.
Suitability depends on the actual fabric, colour, stretch, structure, artwork, quantity and sample test.
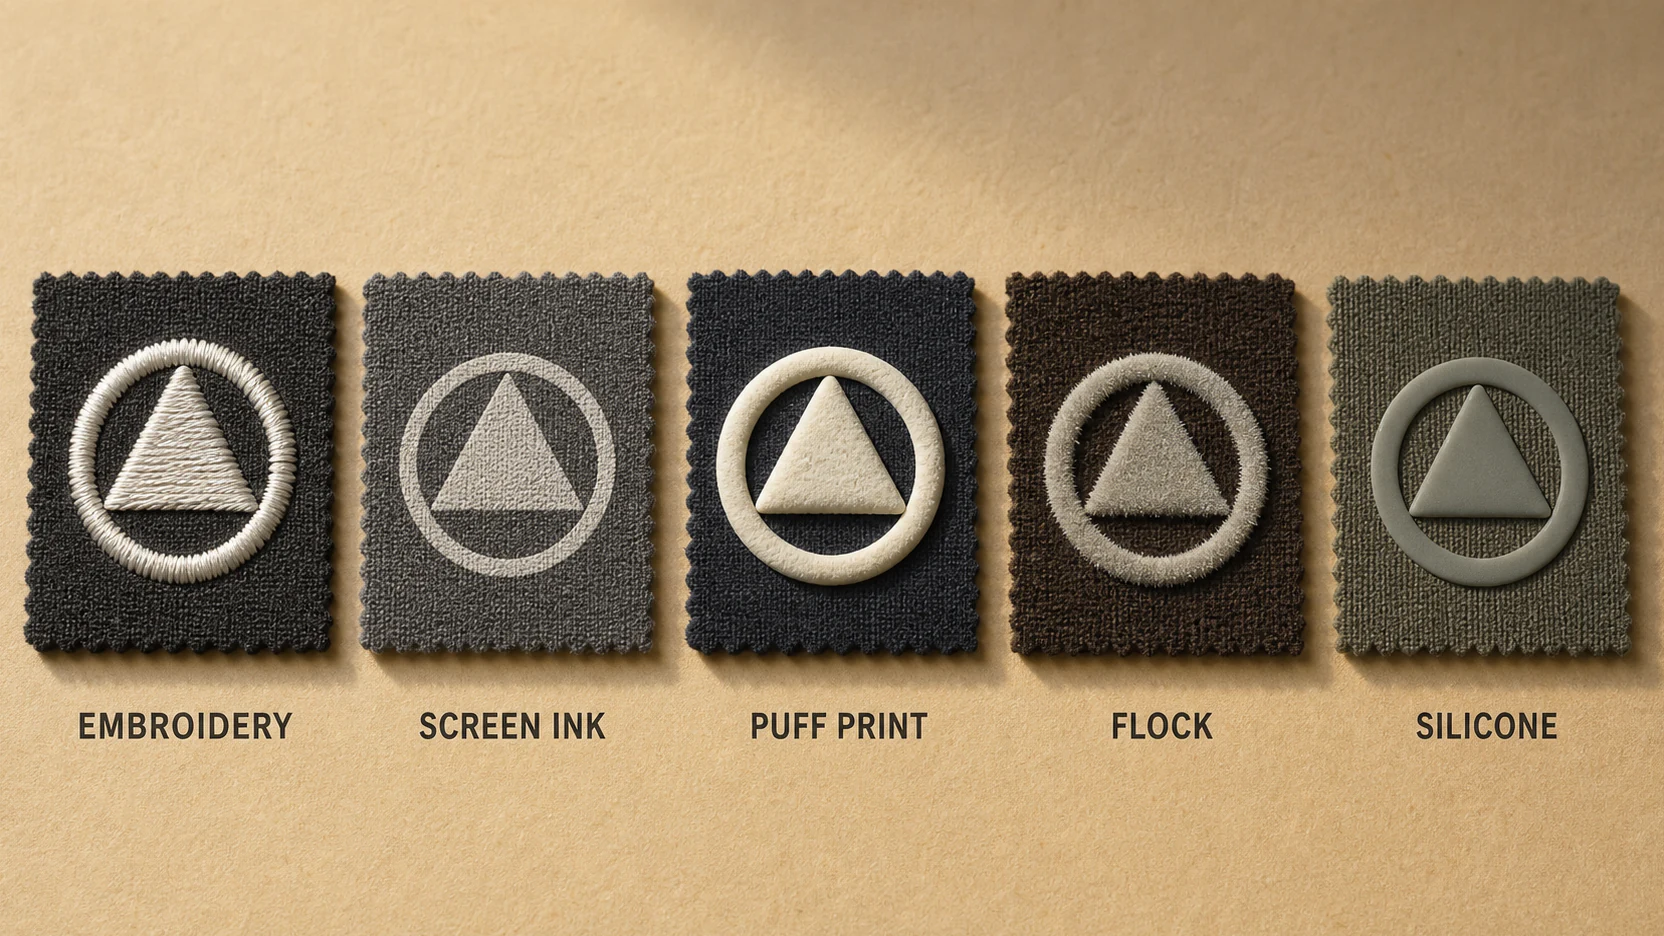
Embroidery
Choose for visible thread direction, lettering and badge-like stitched detail.
Screen Printing
Compare when a flat, screen-deposited colour layer suits the artwork better than thread.
Puff Printing
Compare when the buyer wants a heat-expanded printed surface rather than foam enclosed by stitches.
Flock Printing
Compare when a short-fibre pile is the intended surface instead of continuous embroidery thread.
Silicone / Rubber Printing
Compare when an elastomeric printed or transferred surface is required instead of needle-and-thread texture.
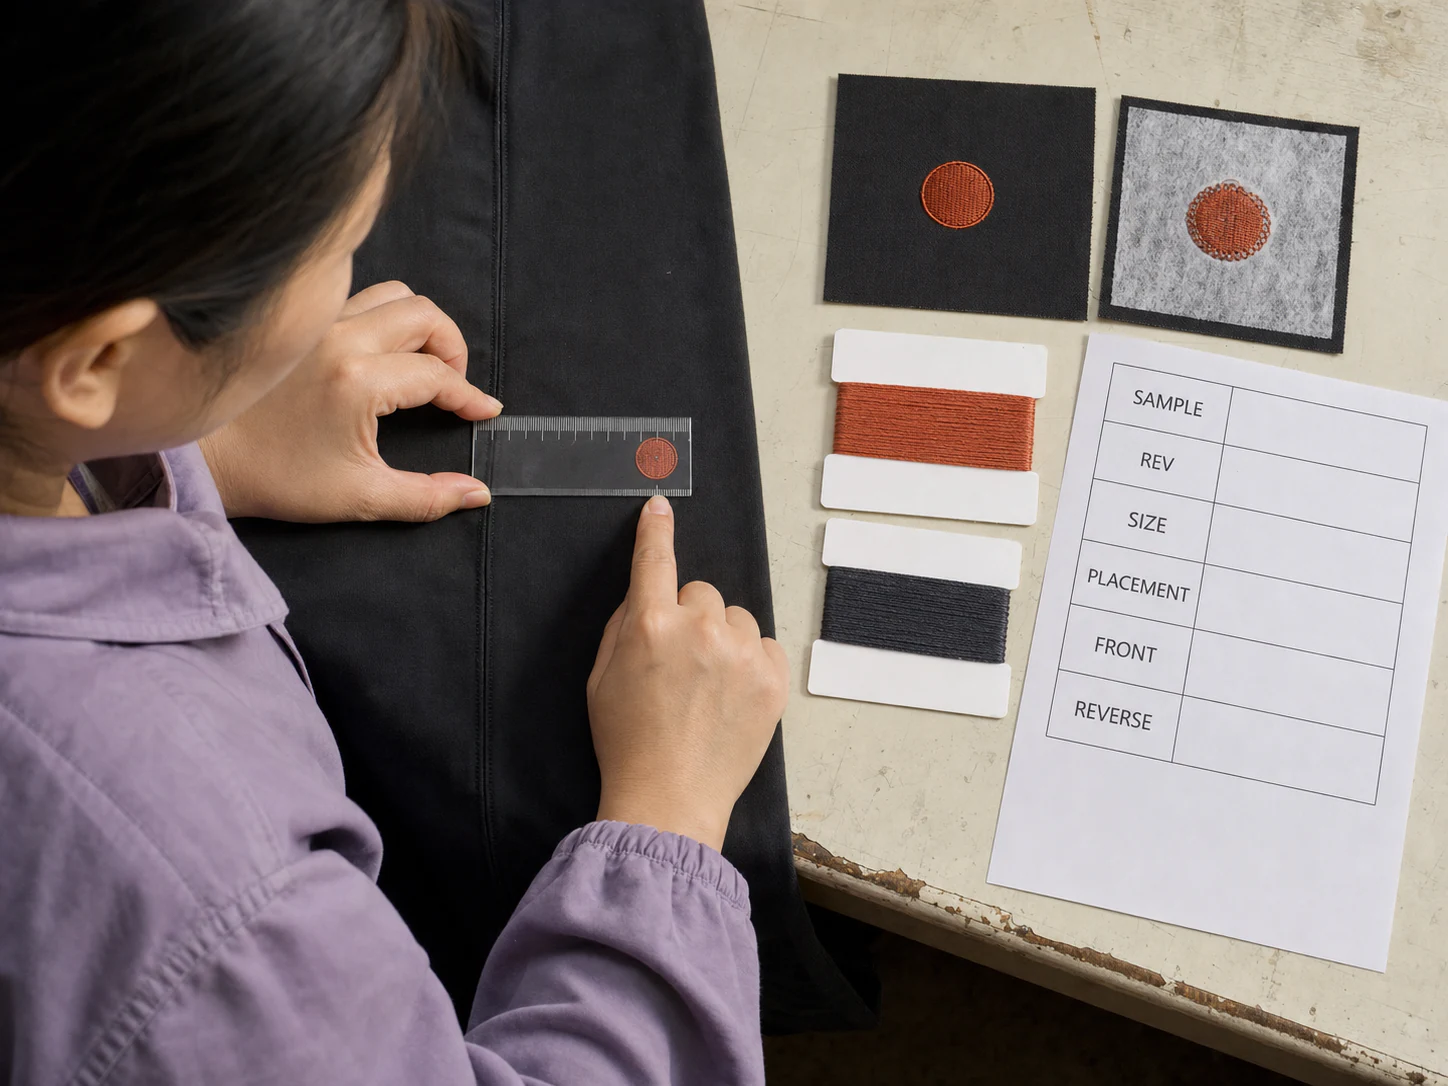
APPROVE THE ACTUAL STITCH-OUT
Freeze the file, fabric, support and placement together
A screen preview can show sequence and estimated stitches but cannot approve real handfeel, puckering or thread appearance.
Use the actual fabric and route materials for the pre-production approval.
Define the method, care cycle, evaluation and acceptance criteria instead of writing a universal wash claim.
- 01
Digitized preview
Review sequence, stitch objects, dimensions and estimated stitch count.
- 02
Equivalent-fabric test
Use it for early construction checks, not final approval.
- 03
Actual-fabric pre-production sample
Approve the route materials, appearance, reverse and agreed care result.
- 04
Bulk first piece
Compare it with the sealed sample before the run continues.
COMMERCIAL FIT
100pieces per style per colourMOQ is simple; the embroidery quote is not
Our usual MOQ is 100 pieces per style per colour. Material or style can change this.
This is Canton Fashion's garment-order baseline—not a universal embroidery-industry minimum.
The quote cannot be reduced to one stitch price without reviewing the final job.
Before production
Artwork cleanup, digitizing, 3D or appliqué construction, stitch-out, revision and tests.
Per garment
Stitches, colour changes, trims, hooping, backing, topping, route material, cleanup and QC.
Conditional
Hard placements, lining, coating, sealing, specialty threads, dense areas and buyer-specific testing.
BUYER FAQ
Questions to settle before digitizing
The answer changes with final size, fabric, placement and route.
Use the production sample and agreed protocol for approval.
01What is your embroidery MOQ?+
Our usual garment-order MOQ is 100 pieces per style per colour. Material or style can change the actual minimum.
02Do you need a vector file?+
A vector or clean original helps identify the shapes, but the design still needs embroidery digitizing.
03Can one file work at every size?+
No. A large size change can alter stitch type, density, detail and stitch count, so another file may be needed.
04What is the smallest text?+
There is no fabric-independent answer. Review the font, stroke, thread and final-size stitch-out.
05Can you embroider T-shirts and stretch fabric?+
They can be evaluated, but lightweight and elastic structures need controlled density, support, hooping and sampling.
06Flat or 3D puff embroidery?+
Flat stitches directly onto the fabric. 3D puff covers foam and needs its own file and cleanup.
07What is appliqué embroidery?+
It places another material on the base fabric and fixes it with tack, cover or decorative stitches.
08Can it cross a seam, zipper or pocket?+
Send a placement photo and measurements. The structure may require a move, a different frame or panel-first embroidery.
09Will the backing remain?+
Cut-away remains under the design; tear-away is largely removed; topping is a separate front-side material.
10How do we approve thread colour?+
Approve a physical shade reference and stitch-out on the intended fabric. Do not rely only on a screen colour.
11How durable is embroidery?+
Define the care method, evaluation and acceptance criteria for the actual line, fabric, support and route.
12Can a waterproof garment stay waterproof?+
Needle holes change the risk. Agree the sealing route and finished-garment test before production.
13Why did stitch count change after resizing?+
Size changes can alter the satin or fill construction, boundary handling and density.
14What should we approve before bulk?+
Approve the file revision, size, position, thread, fabric, backing/topping, route material, front/reverse appearance and test plan.
START WITH THE ACTUAL JOB
Send the artwork, size, fabric and placement
Not sure which route to choose? Send the final-size artwork and a placement photo.
We review the stitch route before sampling.
The form does not promise free digitizing, a fixed quote time, equipment or a wash rating.
- 01
Artwork and dimensions
Upload the image or PDF and state the final design width and height.
- 02
Garment and placement
Provide the product, fabric if known, colour, placement and a structure photo.
- 03
Route and quantity
Choose flat, 3D puff, appliqué or not sure, and state quantity per style and colour.
- 04
Care and timing
Share the target date, care or test requirement and any details that cannot be changed.
Embroidery inquiry
Tell us about the actual garment.
We review the final size, fabric, placement and stitch route before sampling.
Talk on WhatsApp →